Sunday, June 25, 2023
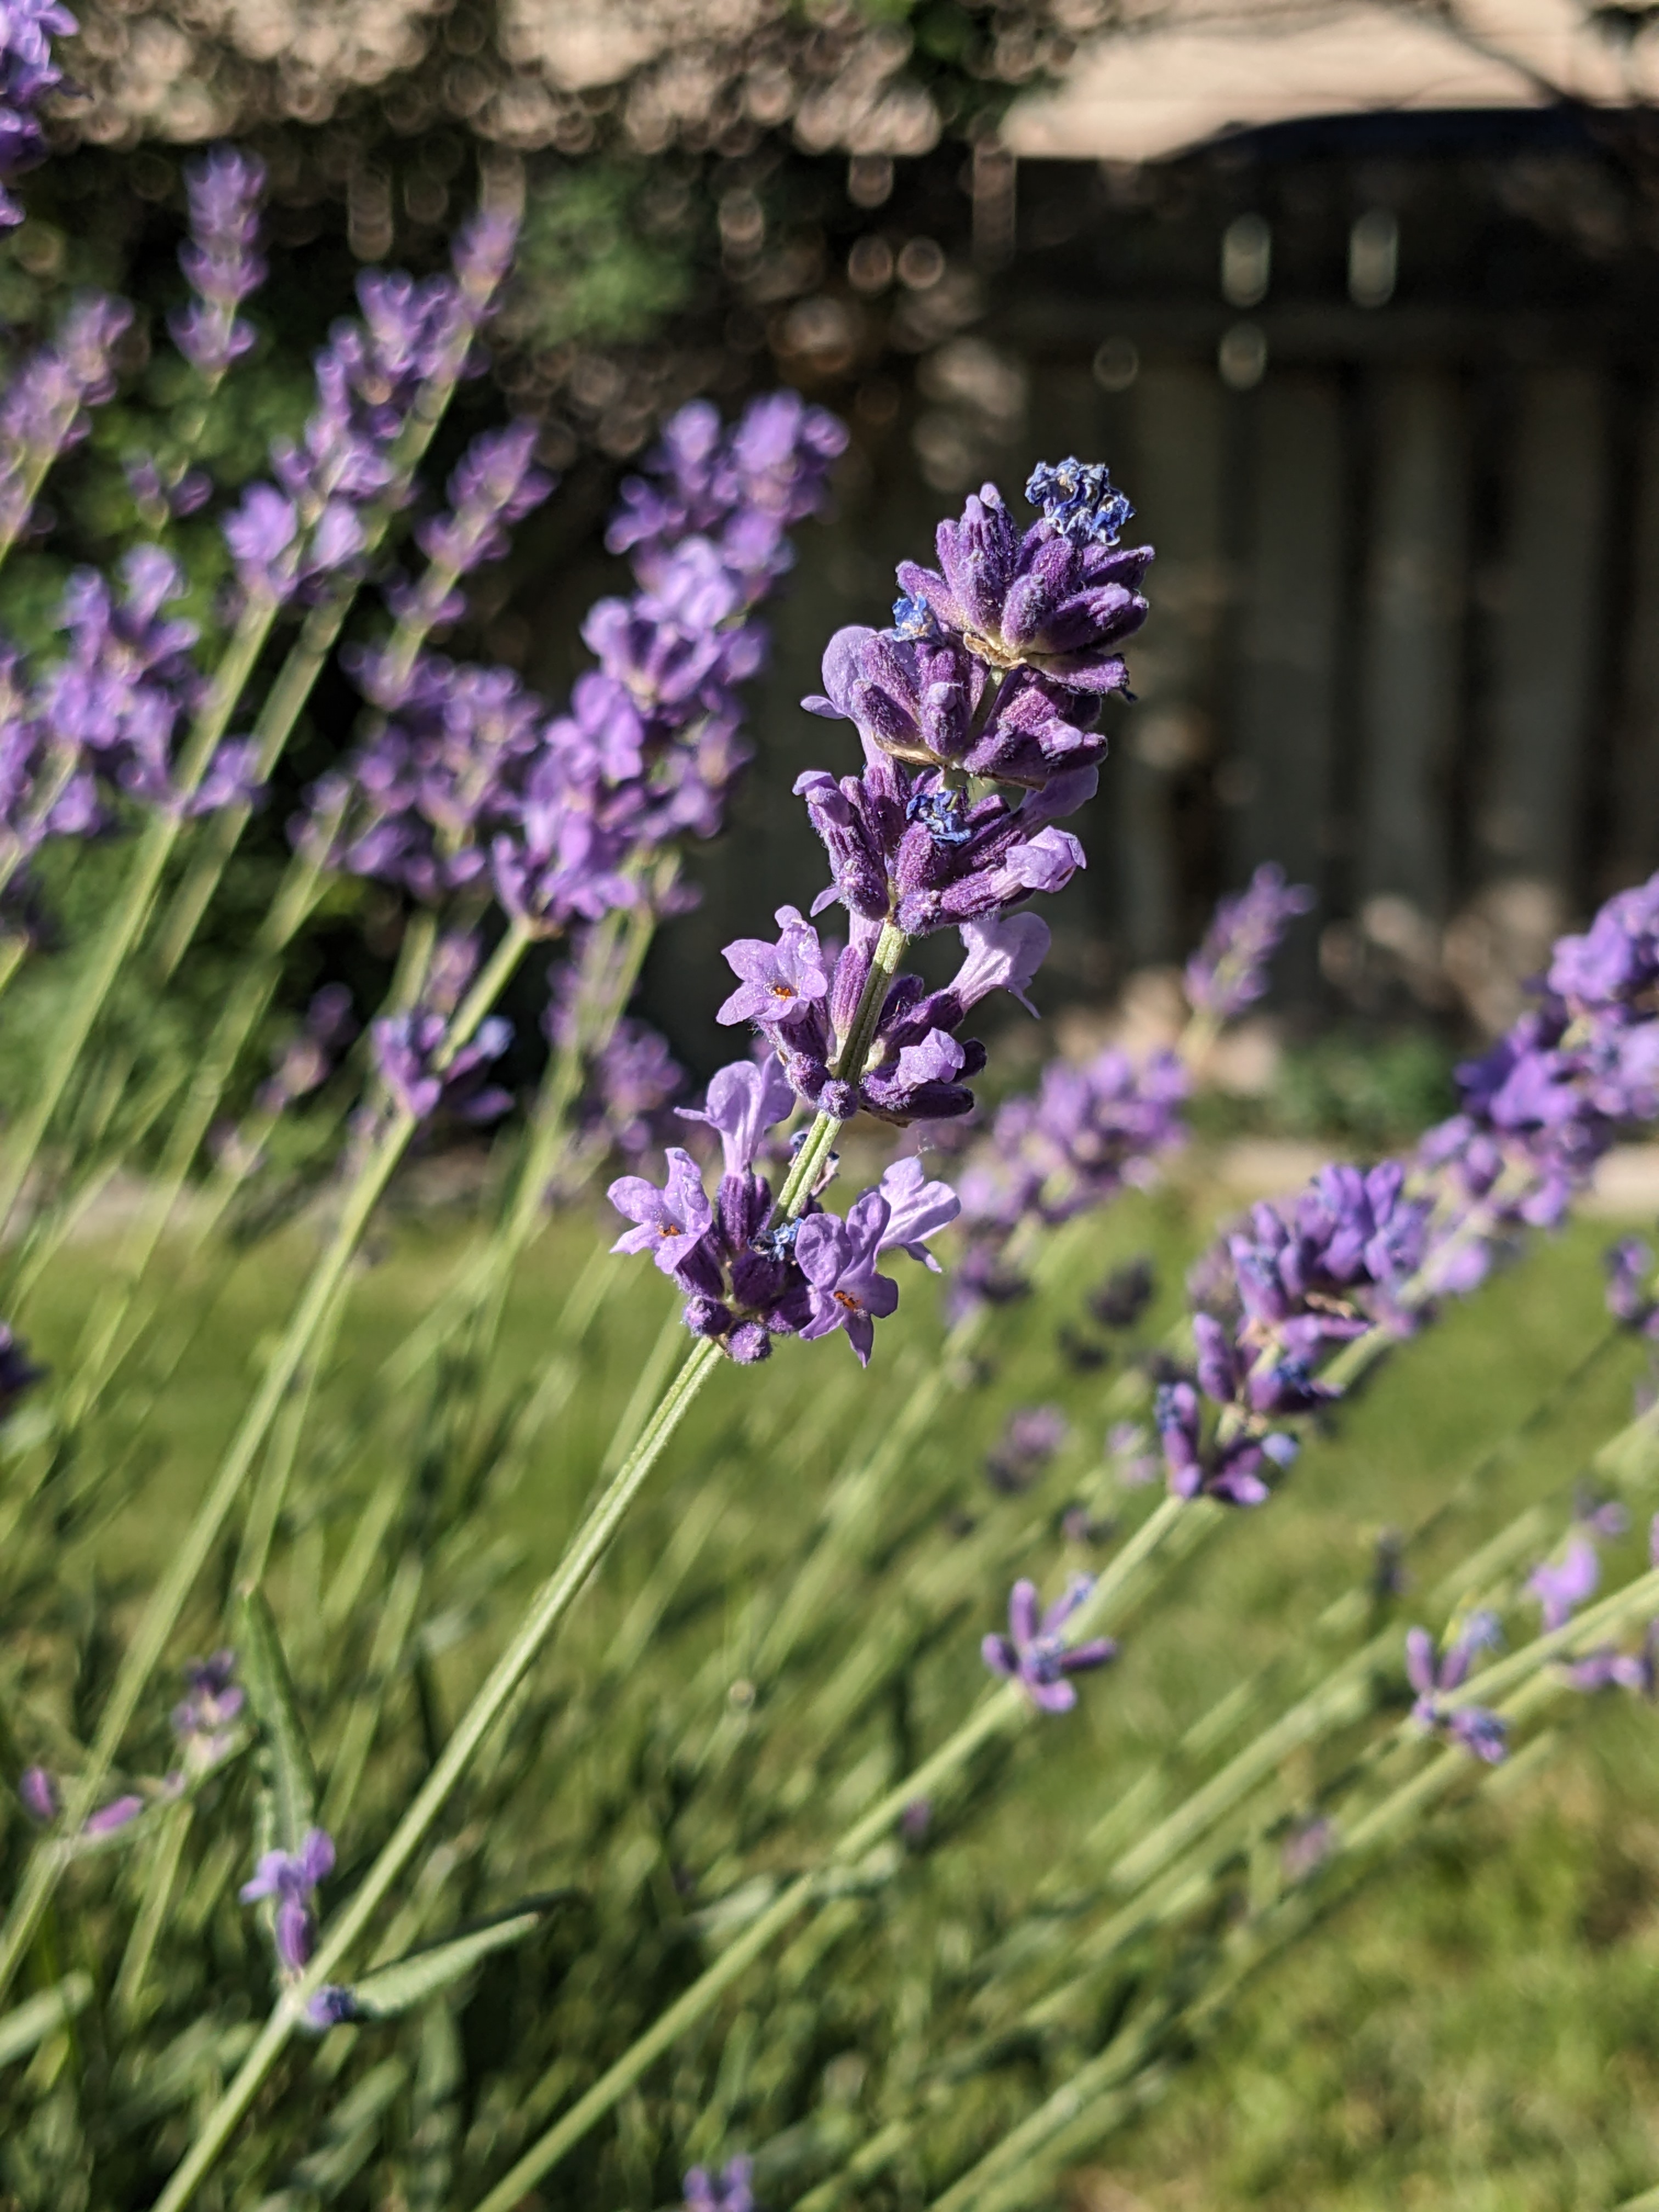
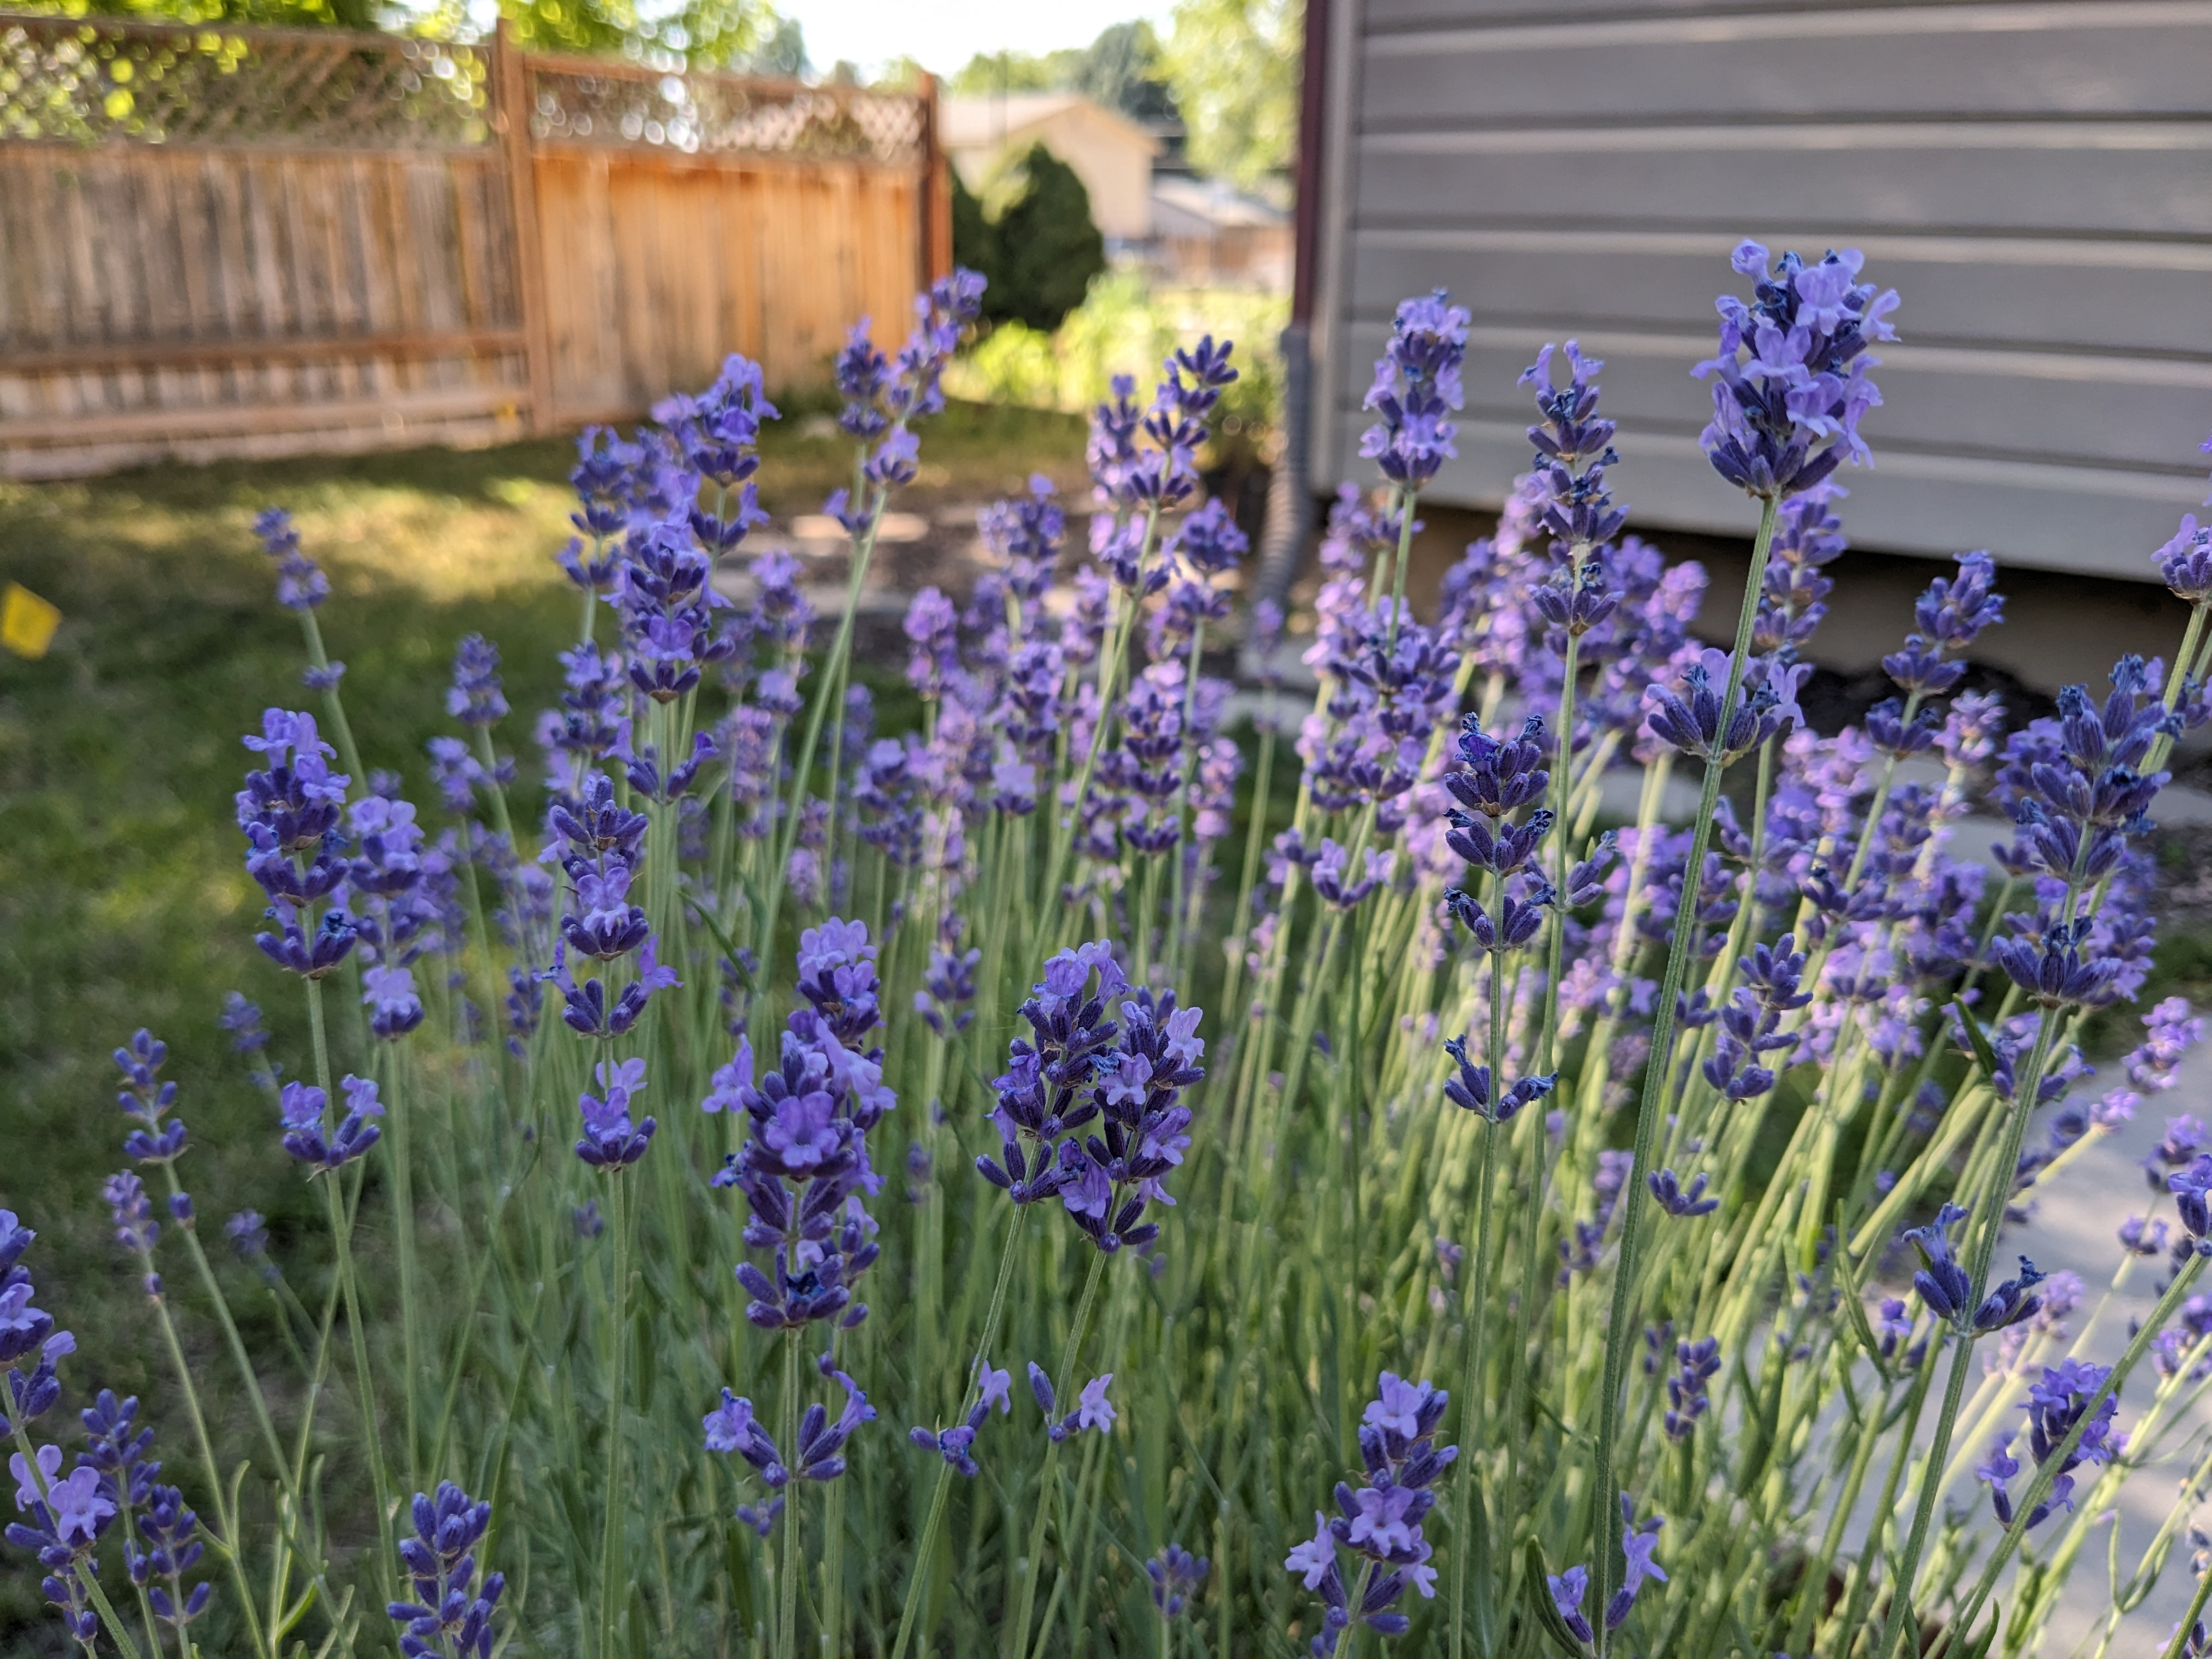
English lavender is a beautiful flowering herb that is perfect for northern latitude gardeners. Here in the Wasatch Front, any plant you grow in the garden will need to be hardy down to well below freezing, as our winters can be cold and long, which makes English Lavender a great choice for gardeners who want a perennial lavender plant. Plus, it handles our hot dry summers with ease, and will do well in water-wise gardens. I have a large plant in my garden that I love to run my hands through whenever I walk by. The smell is heavenly, and the bees absolutely love it. It's usually covered in bees throughout the day.

Size: 2-3 ft. tall, 2-4 ft. wide
HOW TO USE LAVENDER
Lavender is used in many different ways including culinary, therapeutic and aromatic. Check out some ideas below.
Aromatherapy: Place a fresh lavender stems in a vase with other flowers for a beautiful fragrant bouquet or use them dried in potpourri to create a calming mood.
Kitchen: Lavender can be infused in syrups, desserts, and teas for a floral/herbal flavor. It goes well in baked goods, lemonades, and savory foods like roasted vegetables. Also, lavender is often one of the dried herbs in the American version of Herbs Provence (although people will tell you that's NOT supposed to be the case).
Soothing Baths: Dried lavender can be mixed into bath salts and sprinkled in the bathwater.
Herbal: Infuse lavender into oils or salves to use as a soothing and calming skin treatment.
Repellent: Make small sachets to keep in your closet or drawers to repel moths, plus they smell great!

HOW TO GROW ENGLISH LAVENDER
Plant Name: English Lavender (Lavandula angustifolia)
Plant Hardiness: Zones 5-8
Sun: Full sun. Make sure to select a spot that gets a minimum of 6-8 hours of direct sunlight per day.
Water: Water your English Lavender deeply after planting, but let the soil to dry out between waterings. Lavender is drought-tolerant, so you will want to avoid overwatering it to prevent root rot.
Pruning: Prune lavender in early spring to promote bushy growth and prevent legginess. Cut back about one-third of the plant's height, making sure not to cut into the older wood.
Harvesting: Once your English Lavender is ready to bloom, you can harvest it by cutting the stems just before the flowers open. For culinary use, hang them upside down in a cool, dry place to dry.
Problems: English Lavender is a pretty hardy plant, but can experience problems mostly due to excessive moisture. Dry soils will make it much happier than rich, moisture-laden soils. Also, these plants like a dry climate, similar to the Mediterranean where they originate. They will not be thrive in high humidity. Soggy winters, and temperatures down well below zero, without a protective layer of snow or a plant covering, can also harm the plant.
Sun: Full sun. Make sure to select a spot that gets a minimum of 6-8 hours of direct sunlight per day.
Planting: English Lavender prefers soil that is sandy, dry to medium, and well-drained. Also, it prefers a slightly alkaline soil, so our Utah soil is perfect for it. Dig a hole slightly bigger than the plant's root ball. Place the English Lavender in the hole, ensuring that the top of the root ball is level with or just barely above the soil surface. Space plants about 12-18 inches apart as they will get quite large as they grow.
Water: Water your English Lavender deeply after planting, but let the soil to dry out between waterings. Lavender is drought-tolerant, so you will want to avoid overwatering it to prevent root rot.
Pruning: Prune lavender in early spring to promote bushy growth and prevent legginess. Cut back about one-third of the plant's height, making sure not to cut into the older wood.
Harvesting: Once your English Lavender is ready to bloom, you can harvest it by cutting the stems just before the flowers open. For culinary use, hang them upside down in a cool, dry place to dry.

HOW TO USE LAVENDER
Lavender is used in many different ways including culinary, therapeutic and aromatic. Check out some ideas below.
Aromatherapy: Place a fresh lavender stems in a vase with other flowers for a beautiful fragrant bouquet or use them dried in potpourri to create a calming mood.
Kitchen: Lavender can be infused in syrups, desserts, and teas for a floral/herbal flavor. It goes well in baked goods, lemonades, and savory foods like roasted vegetables. Also, lavender is often one of the dried herbs in the American version of Herbs Provence (although people will tell you that's NOT supposed to be the case).
Soothing Baths: Dried lavender can be mixed into bath salts and sprinkled in the bathwater.
Herbal: Infuse lavender into oils or salves to use as a soothing and calming skin treatment.
Repellent: Make small sachets to keep in your closet or drawers to repel moths, plus they smell great!
Lavender is not just a beautiful pollinator-friendly plant, but it's also a great aromatic herb to use in your kitchen and as an herbal remedy. This drought-tolerant perennial can be a beautiful and functional addition to your water-wise garden.

Friday, June 23, 2023
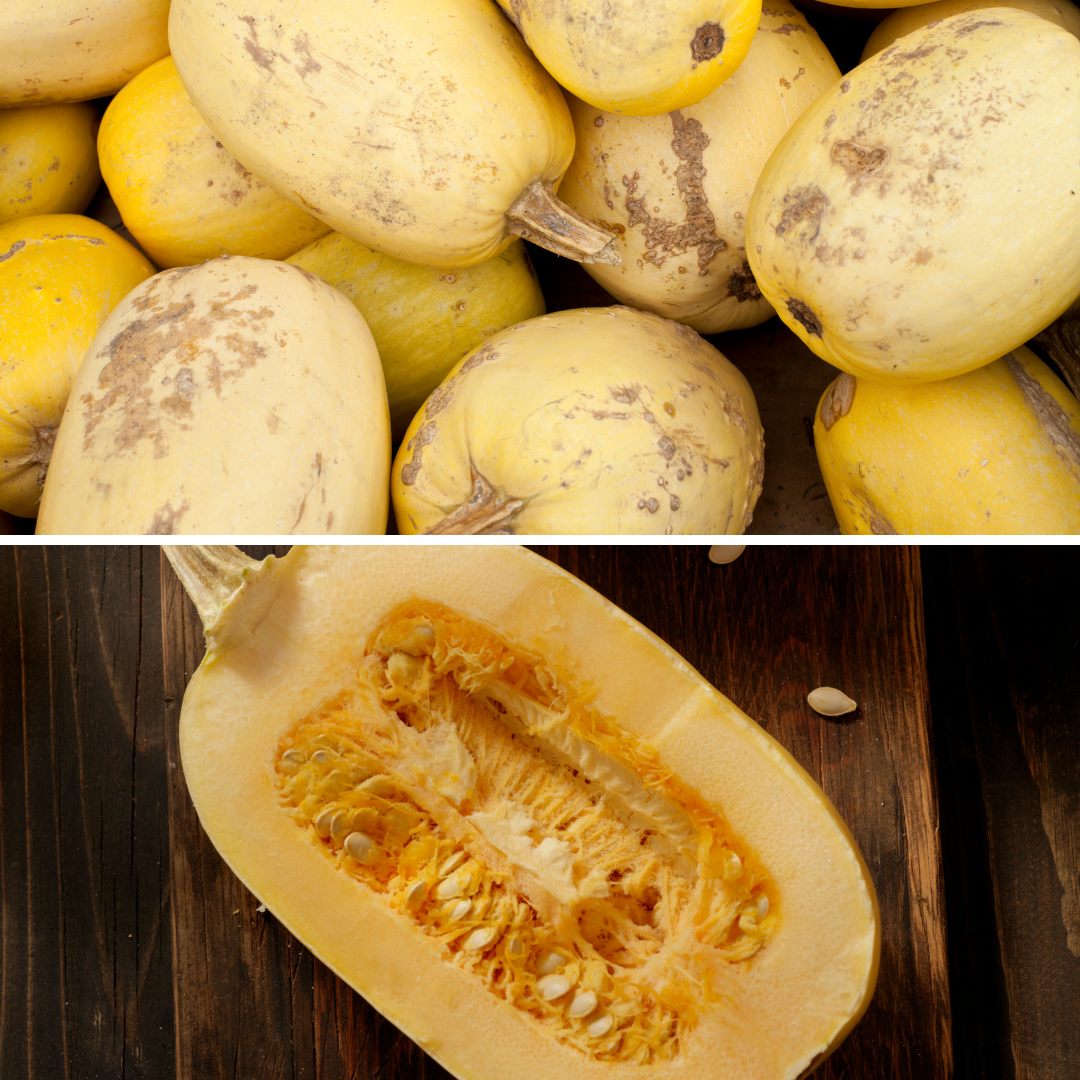
Spaghetti squash is one of my favorite squashes to eat. We love to bake it or cook it in the Instant Pot (see recipe for this below!), and top them with a chunky marinara, parmesan cheese and ground beef. You get all of the deliciousness of a big bowl of spaghetti, without the overstuffed feeling, or massive carb load, bloating and need to take a nap afterward. Growing them in the garden can be an easy way to get a lot. Check out how to grow them below, and scroll down a little farther to see a quick Instant Pot recipe for cooking the squash to a perfect al dente pasta texture.


GROWING SPAGHETTI SQUASH
Location: Choose a sunny spot in your garden with well-draining soil. Spaghetti squash plants require at least six hours of direct sun each day.
Planting: Plant spaghetti squash seeds directly into the ground after the last frost date for your region, or plant starts as soon as you can after last frost. They require a decent length of time to harvest, so you'll want to make sure you have enough time to harvest if you're in an area with a shorter growing season, like we have here in Utah.
Dig a small hole about an inch deep and place two to three seeds in each hole, spacing them about three feet apart, or plant your starts with similar spacing. It can be helpful to add a layer of organic mulch around the plants to help retain moisture and slow down weed growth. Spaghetti squash vines tend to be very lengthy, so providing a trellis or sturdy cage can save space and keep the fruit off the ground, reducing the risk of fruit rot or pest damage.
Water: Keep the soil consistently moist, especially during the flowering and fruiting stages. Water deeply but avoid overwatering. Squash plants are susceptible to root rot.
Pests/Disease: Check plants regularly for squash bugs (the absolute worst!) Make sure to check under the leaves for egg clusters, remove and destroy any you find, and be sure to check the base of plants for the adults. Squash bugs are the worst and will destroy your plant VERY quickly. Also, watch out for vine borers, and powdery mildew.
Harvest: Your spaghetti squash is ready for harvest when the skin turns a deep yellow or orange and has hardened. Cut the fruit from the vine, but leave a small stem attached. The fruit will stay good for much longer if you keep the stem on. Allow them to cure in a warm and dry place for a couple weeks before storing.

INSTANT POT SPAGHETTI SQUASH RECIPE
Baking spaghetti squash is usually my go to method for eating them, but, recently, I discovered an even easier method after testing a few different recipes online. This method usually helps me get the more firmer al dente pasta texture when the squash is shredded up. (I tend to over-bake my squash.)
- Place a tray in the bottom of your Instant Pot, add a couple cups of water (the Instant Pot cup).
- Slice your Spaghetti Squash in half lengthwise, and scoop out the seeds.
- Place both halves inside the instant pot however they will fit.
- Close the lid and seal the pressure valve.
- Cook at high pressure for 7 or 8 minutes. (It will take about 10 to build pressure, then cook for 7-8 minutes.)
- When the timer goes off, immediately release the pressure valve.
- Once all the pressure is done being released, remove the squash halves carefully (they'll be soft and very hot), drain off any excess water, and shred the squash with a fork.
- Serve with whatever you're eating.
What are your favorite ways to eat Spaghetti Squash? Do you have any tips or tricks for a successful harvest?

Thursday, June 22, 2023
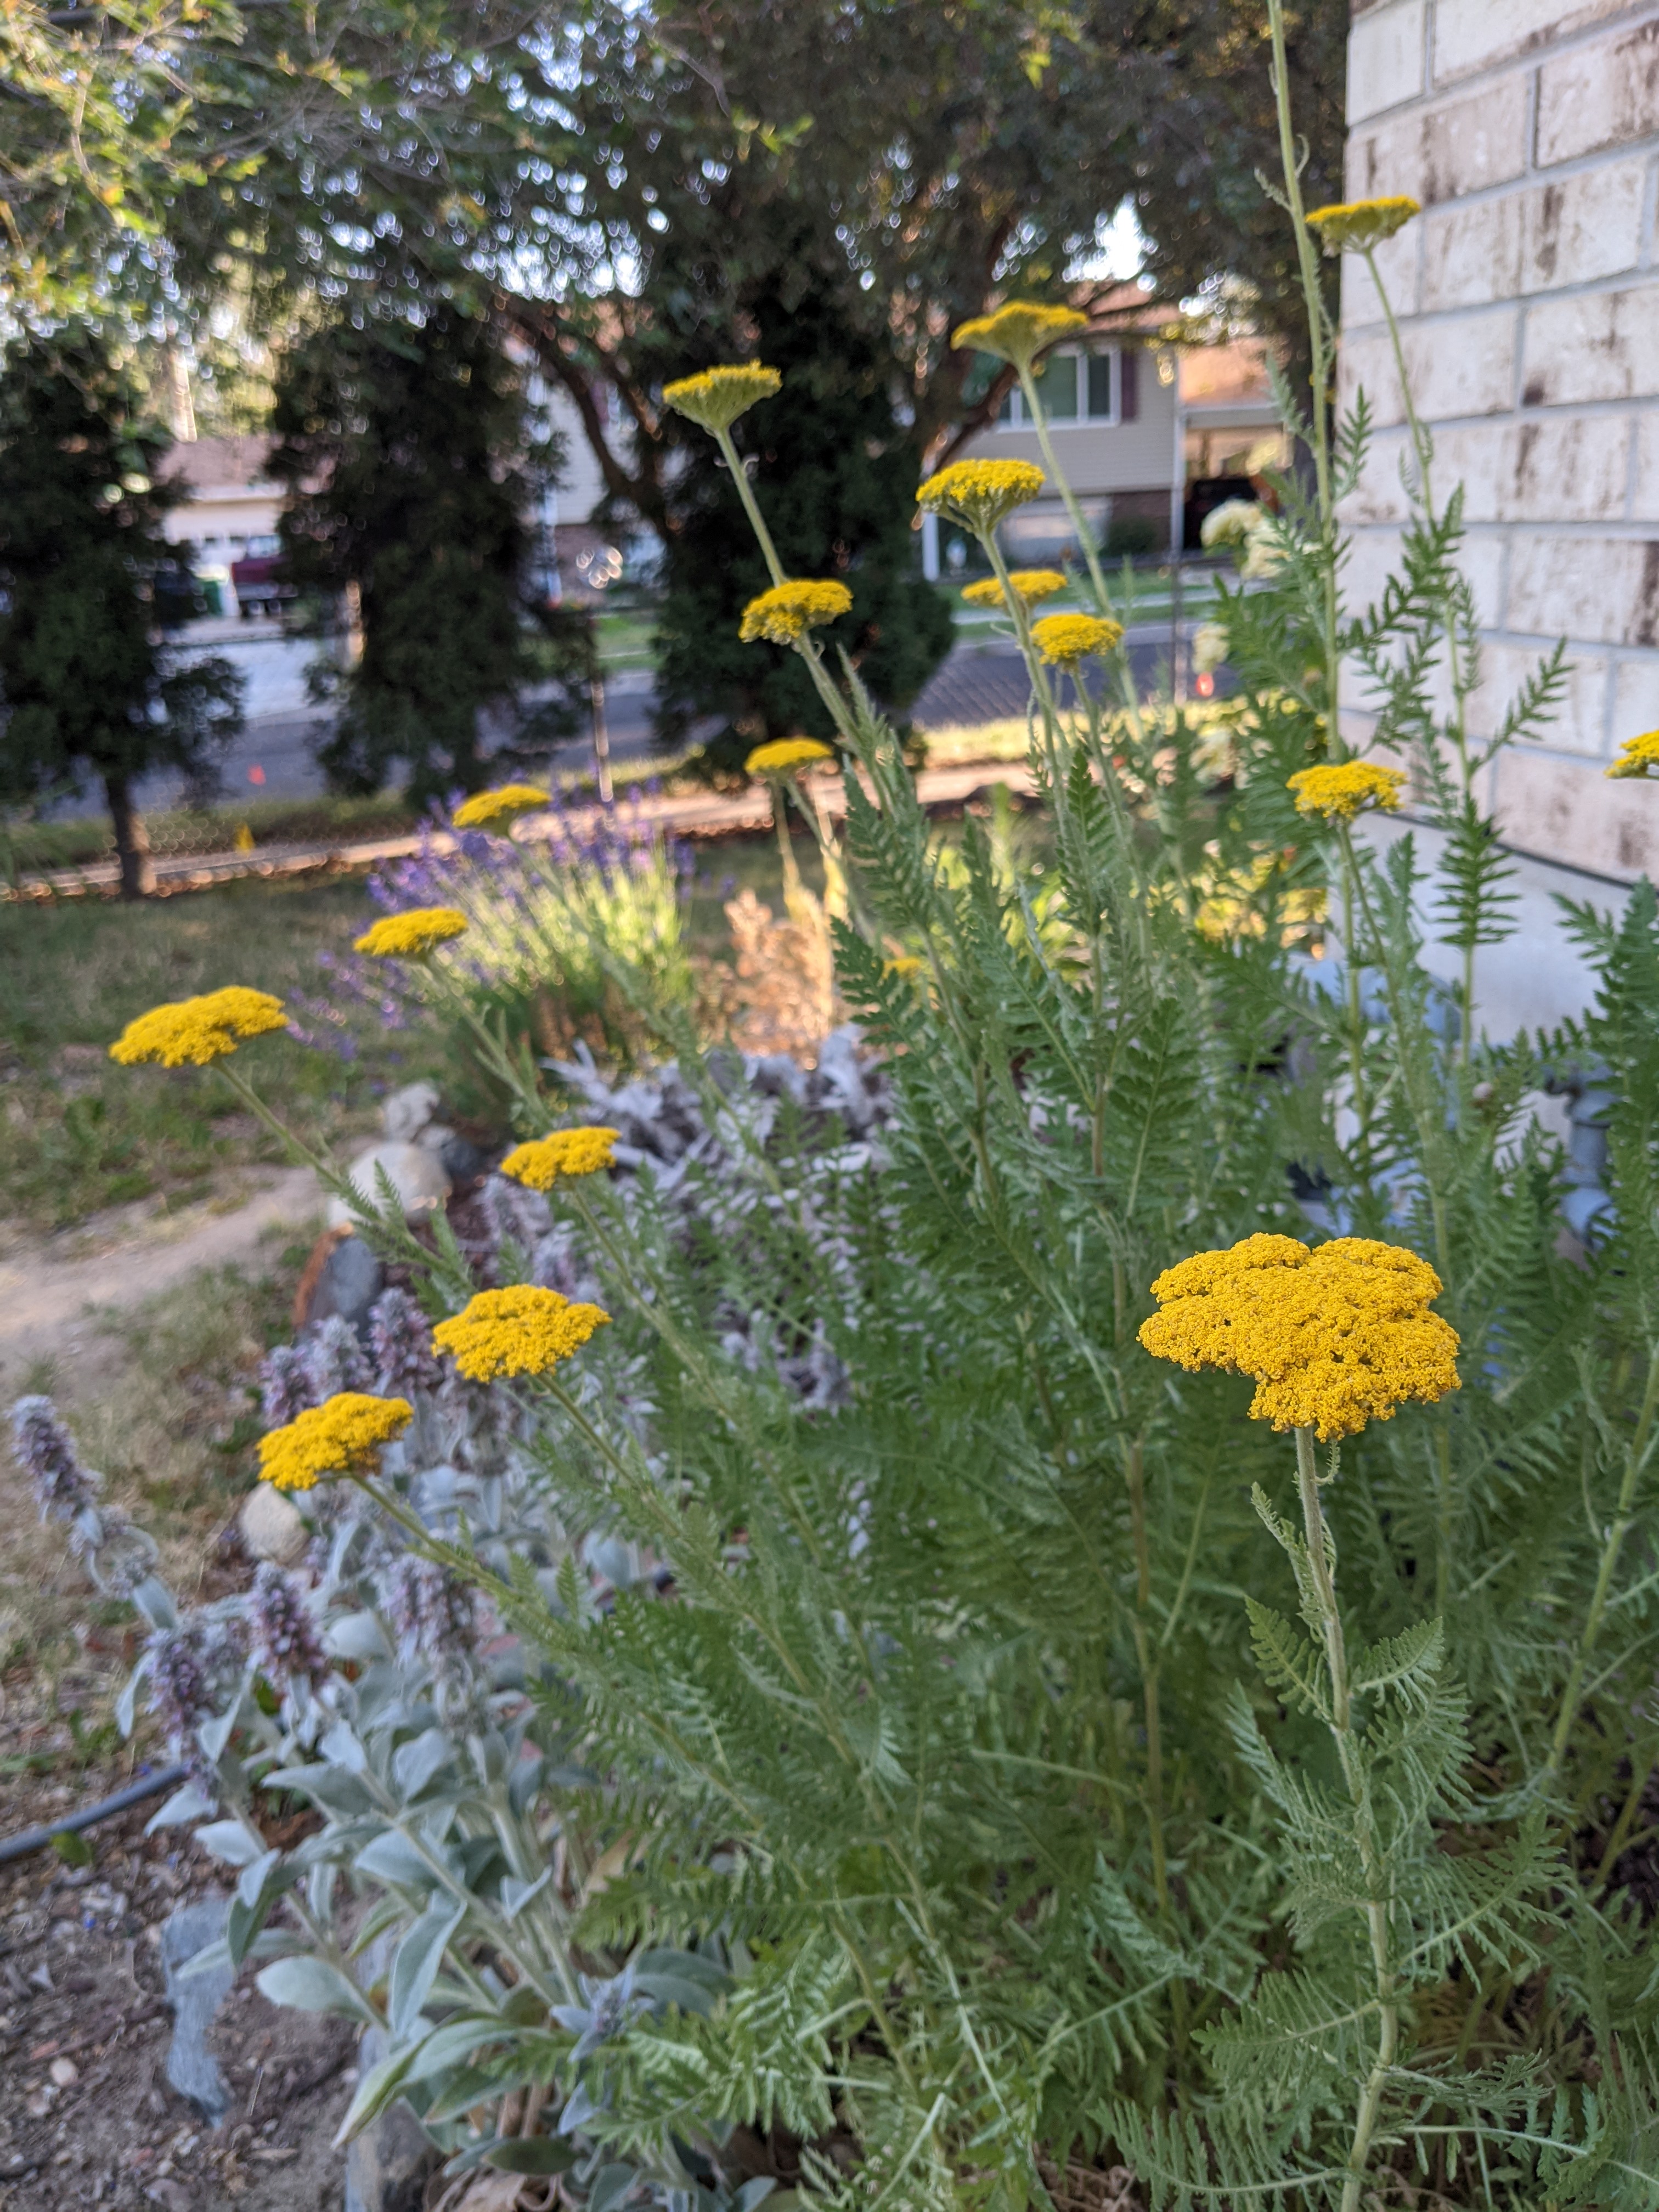
If you've ever wanted a plant that grows like a champion in a hot dry spot, I highly recommend picking up a yarrow plant. They are beautiful, low-maintenance, some varieties get decently large, and bees love them. When I was a kid, my mom had a whole row of them along the back of her large vegetable garden. I thought they were cool, but had no idea they were such a magnet for the bees, and I now understand why she planted them. I have mine growing next to the west wall of my house, and even though it bakes in the heat bouncing off the house wall, it still thrives. I babied it the first couple of years, but now I've hardly watered it and it seems to be doing just fine, in fact, it's bigger than it's ever been.

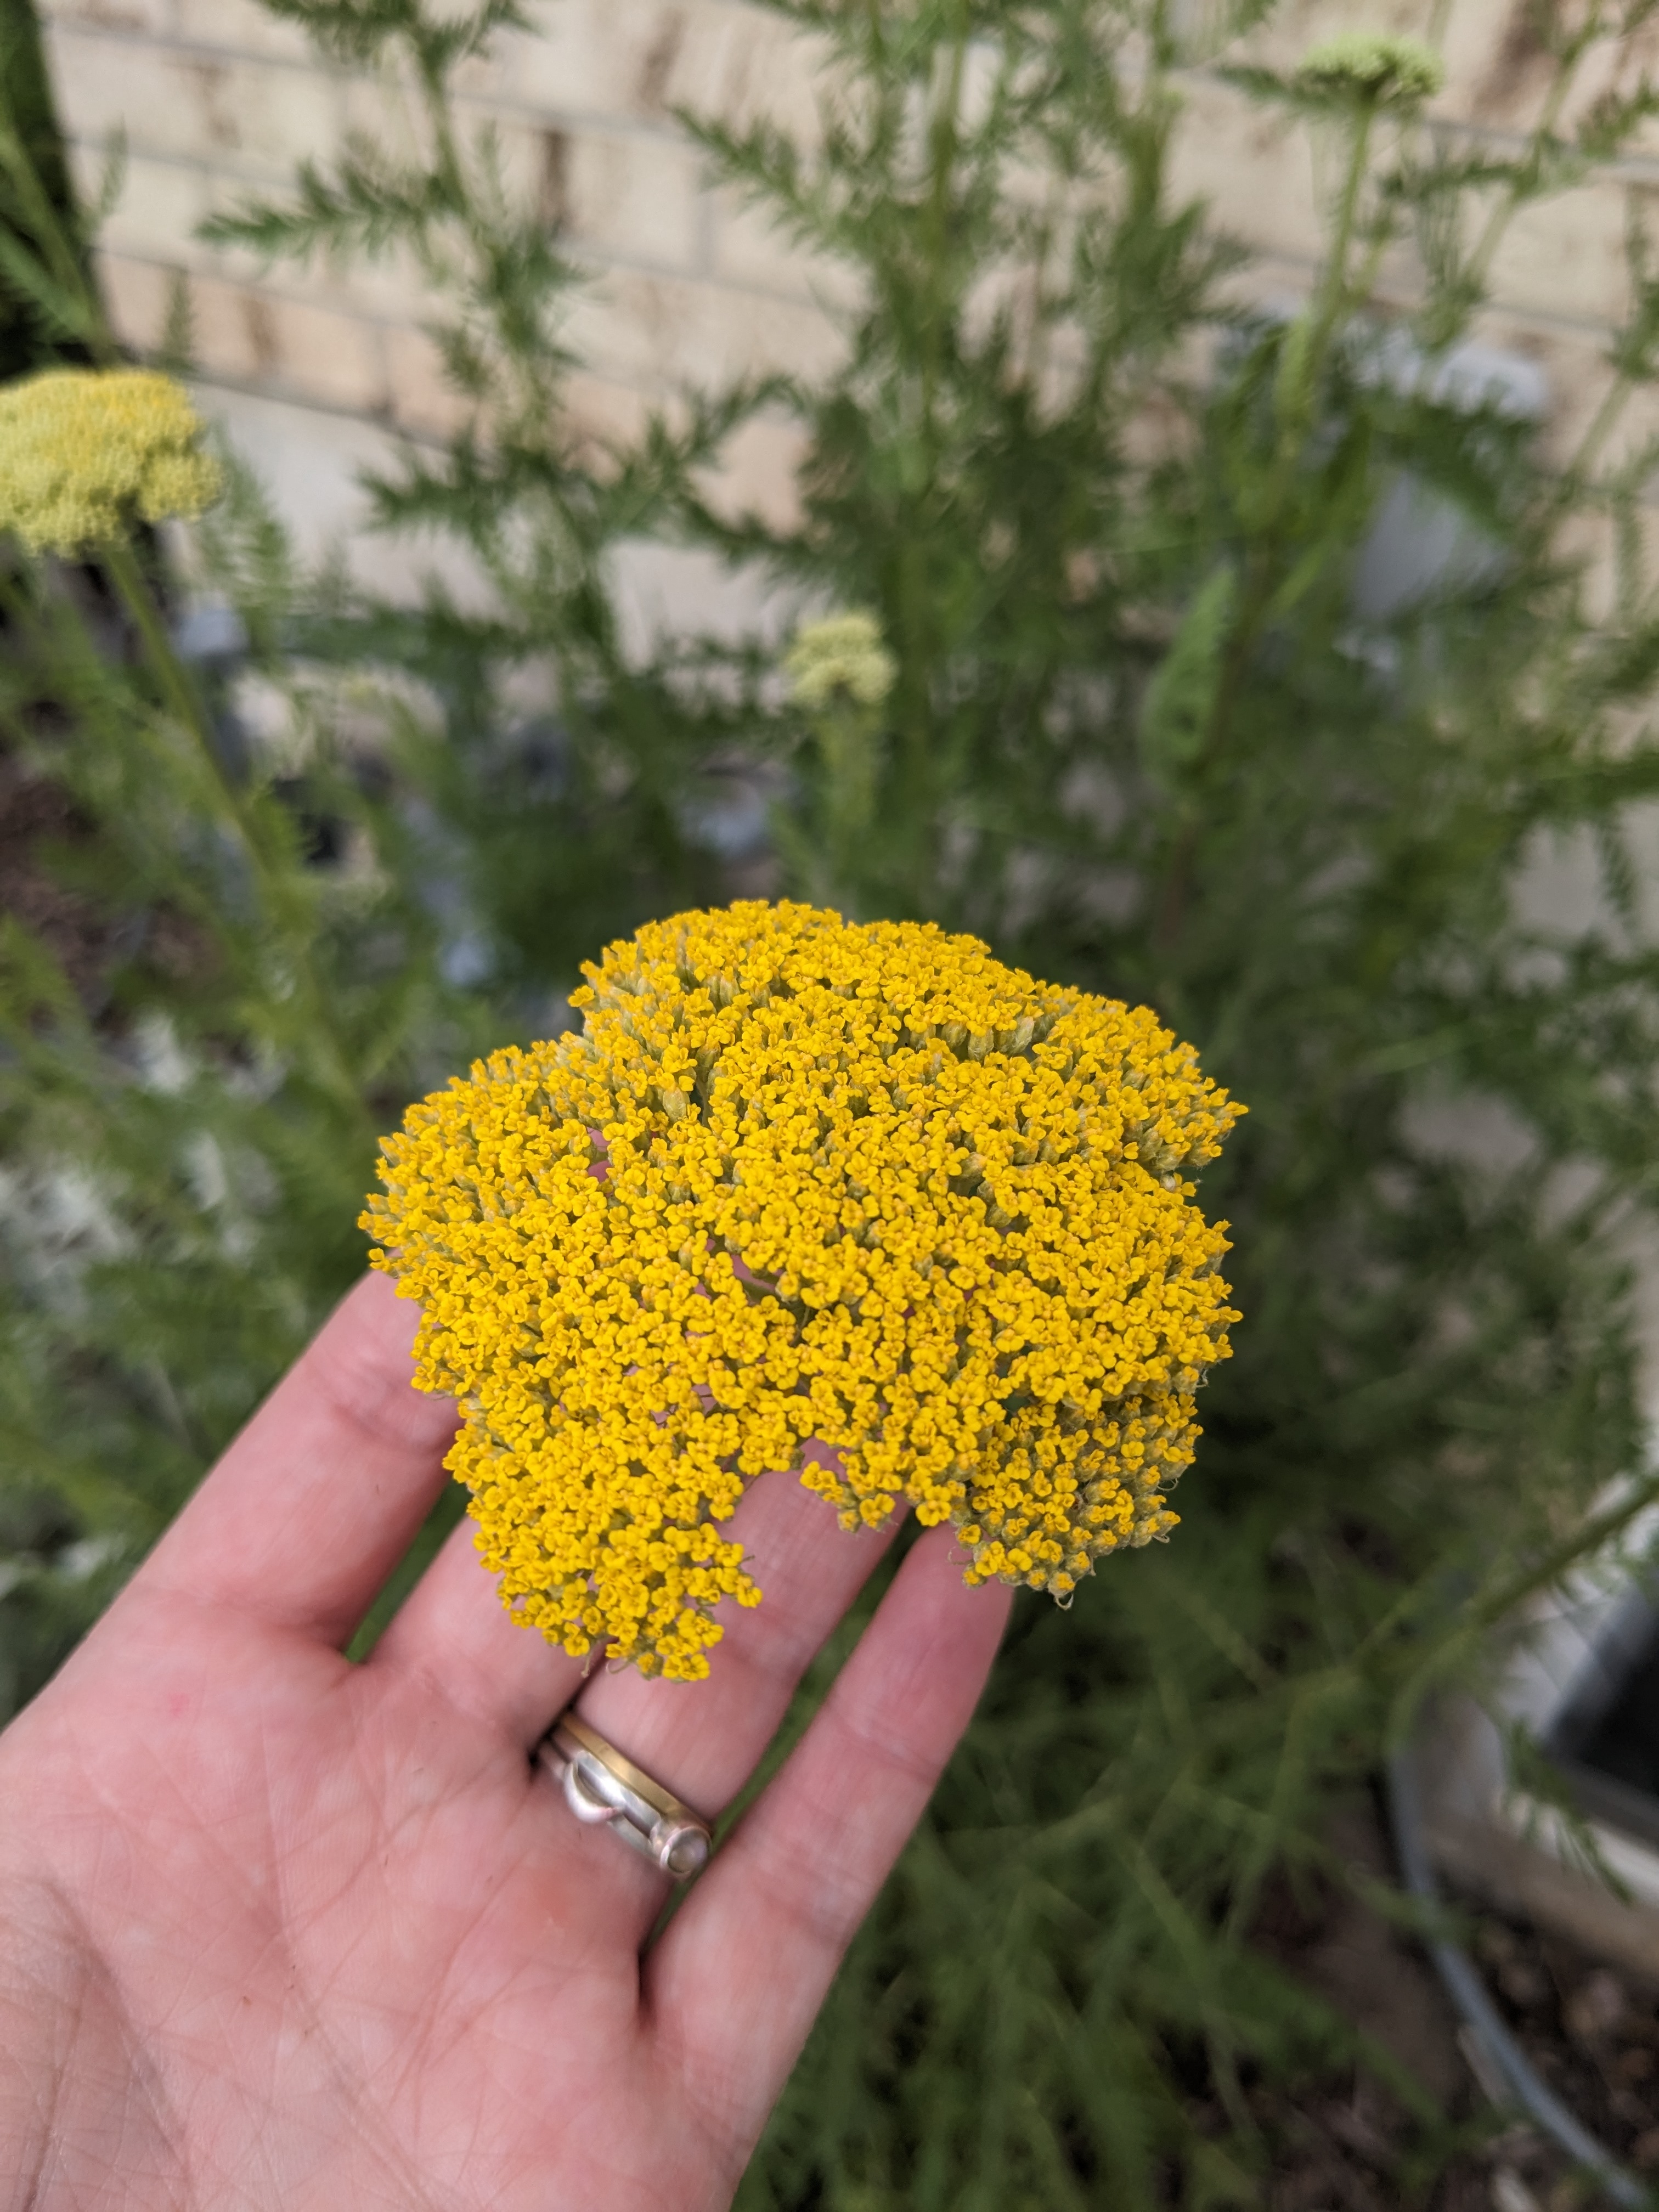

HOW TO GROW YARROW
Location: Choose a sunny spot in your garden with well-draining soil. Plant it in full sun to encourage compact growth and a lot of flowers. In partial sun or shade, it can struggle or be leggy. Yarrow can tolerate a variety of soil types but prefers a slightly alkaline pH. If you're living in Utah, like I am, most of our soil here is alkaline.
Planting Tips: Yarrow can be started from seeds or purchased as young plants. Sow the seeds directly in the garden in early spring or fall, or transplant it, spaced 12-24+ inches apart. Depending on the variety, yarrow plants can get pretty big. It can also be helpful to prepare the soil by removing weeds and loosening it with a garden fork or tiller. Add organic matter like compost to improve soil quality and drainage capabilities.
Watering: Yarrow thrives in hot, dry conditions, and will not tolerate constantly wet soil. Water young plants regularly until they establish roots, then reduce watering frequency. Yarrow plants are drought-tolerant once established, so they generally don't require much water. If your area receives less than an inch of rain a week in the summer, watering them will help them look their best.
Maintenance: Yarrow is super low maintenance. Deadhead the flowers to encourage continuous blooming. Divide clumps every few years to keep the plant healthy and vigorous.
Pest/Disease: Yarrow is generally pest and disease resistant. Although, watch out for aphids or powdery mildew, and treat accordingly.
Harvesting/Pruning: Harvest yarrow flowers when they're fully open for use in floral arrangements. Prune the plant back to the base foliage in late fall or early spring to encourage new growth.

HERBAL/MEDICINAL USES FOR YARROW
Yarrow has other purposes in the garden besides being a pollinator plant, and looking pretty in floral arrangements. It's an herb that has been used for medicinal purposes by many cultures.
Wound Care: Yarrow was traditionally used to treat wounds, due to its anti-inflammatory properties. It has been used topically as a poultice or salve to promote healing and to treat skin conditions and irritations, like rashes or eczema.
Digestive Aid: Yarrow tea is thought to help with stomach cramps, bloating, and other gastrointestinal discomforts.
Period Health: Drinking yarrow tea or taking yarrow supplements during your period may provide relief from some of the symptoms. It is thought to help regulate flow and reduce cramping.
Yarrow is a low maintenance, drought tolerant perennial that attracts pollinators, and looks beautiful in your garden.
Will you be planting Yarrow this year?

Subscribe to:
Posts (Atom)


Social Icons